Azure Functions (FaaS) is simply a platform to upload the application code, run, and manage the application without having to think about setting up any servers.
Serverless compute can be thought of as a "function as a service" (FaaS), or a microservice that is hosted on a cloud platform. Your business logic runs as functions and you don't have to manually provision or scale infrastructure. Serverless computing helps solve the allocation problem by scaling up or down automatically, and you're only billed when your function is processing work.
The two most common approaches are Azure Logic Apps and Azure Functions, which we'll focus on this blog.
Azure Functions is the function-as-a-service (FaaS) offering from Azure Serverless the equivalent of AWS Lambda from Amazon.
What is Azure Functions?
Azure Functions is a serverless application platform. It enables developers to host business logic that can be executed without provisioning infrastructure. Functions provides intrinsic scalability and you are charged only for the resources used. You can write your function code in the language of your choice, including C#, F#, JavaScript, Python, and PowerShell Core. Support for package managers like NuGet and NPM is also included, so you can use popular libraries in your business logic.
Benefits of a serverless compute solution
- Avoids over-allocation of infrastructure
- Stateless logic
- Event / Trigger Driven.
- Can be converted into Traditional Compute Environment.
Create a function app in the Azure portal
- From Azure Portal > Azure Services > Create a Resource > Compute > Select Function App And fill out all the Basics Tab's information as follows,
Publish Code
Runtime stack Node.js
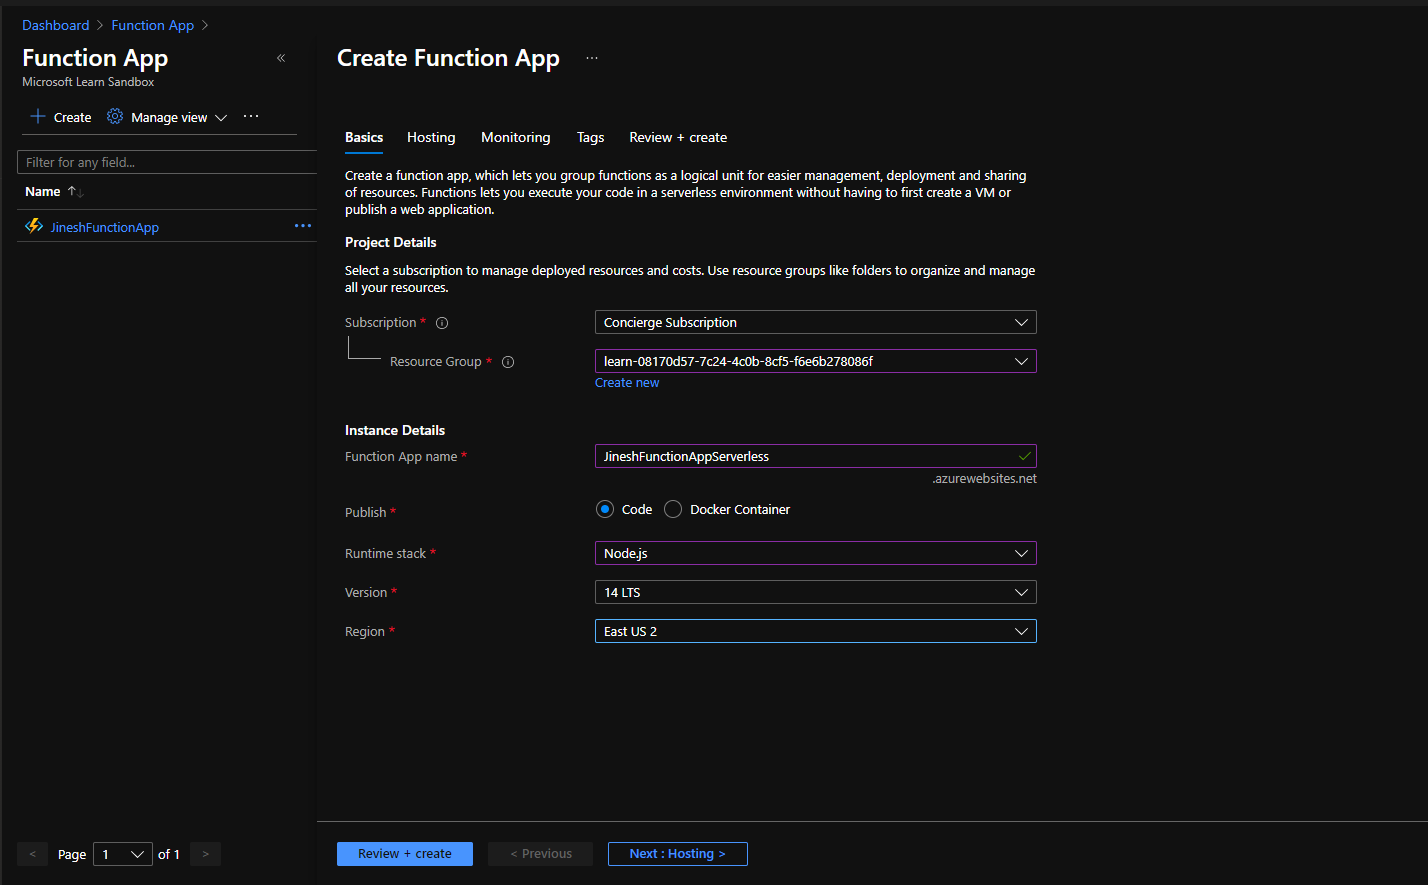
- Next >Hosting : Select Storage Account, Service Plan : Consumption (Serverless)
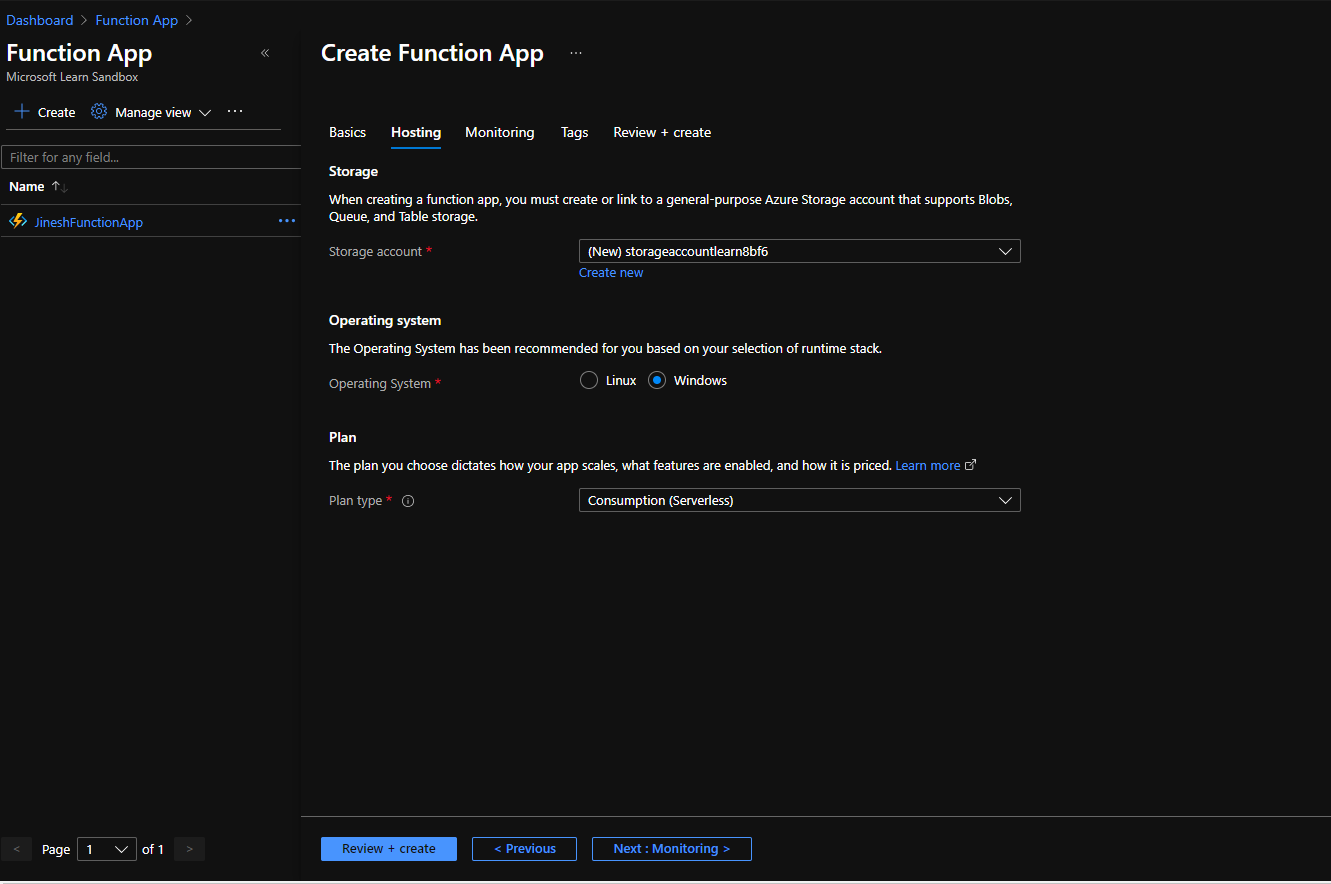
Note : Choose the Consumption plan when using the Azure serverless application platform. This plan provides automatic scaling and bills you when your functions are running. The Consumption plan comes with a configurable timeout period for the execution of a function. By default, it's five (5) minutes, but may be configured to have a timeout as long as 10 minutes.
- No to Monitoring and No Tags. (Just for this example purposes)
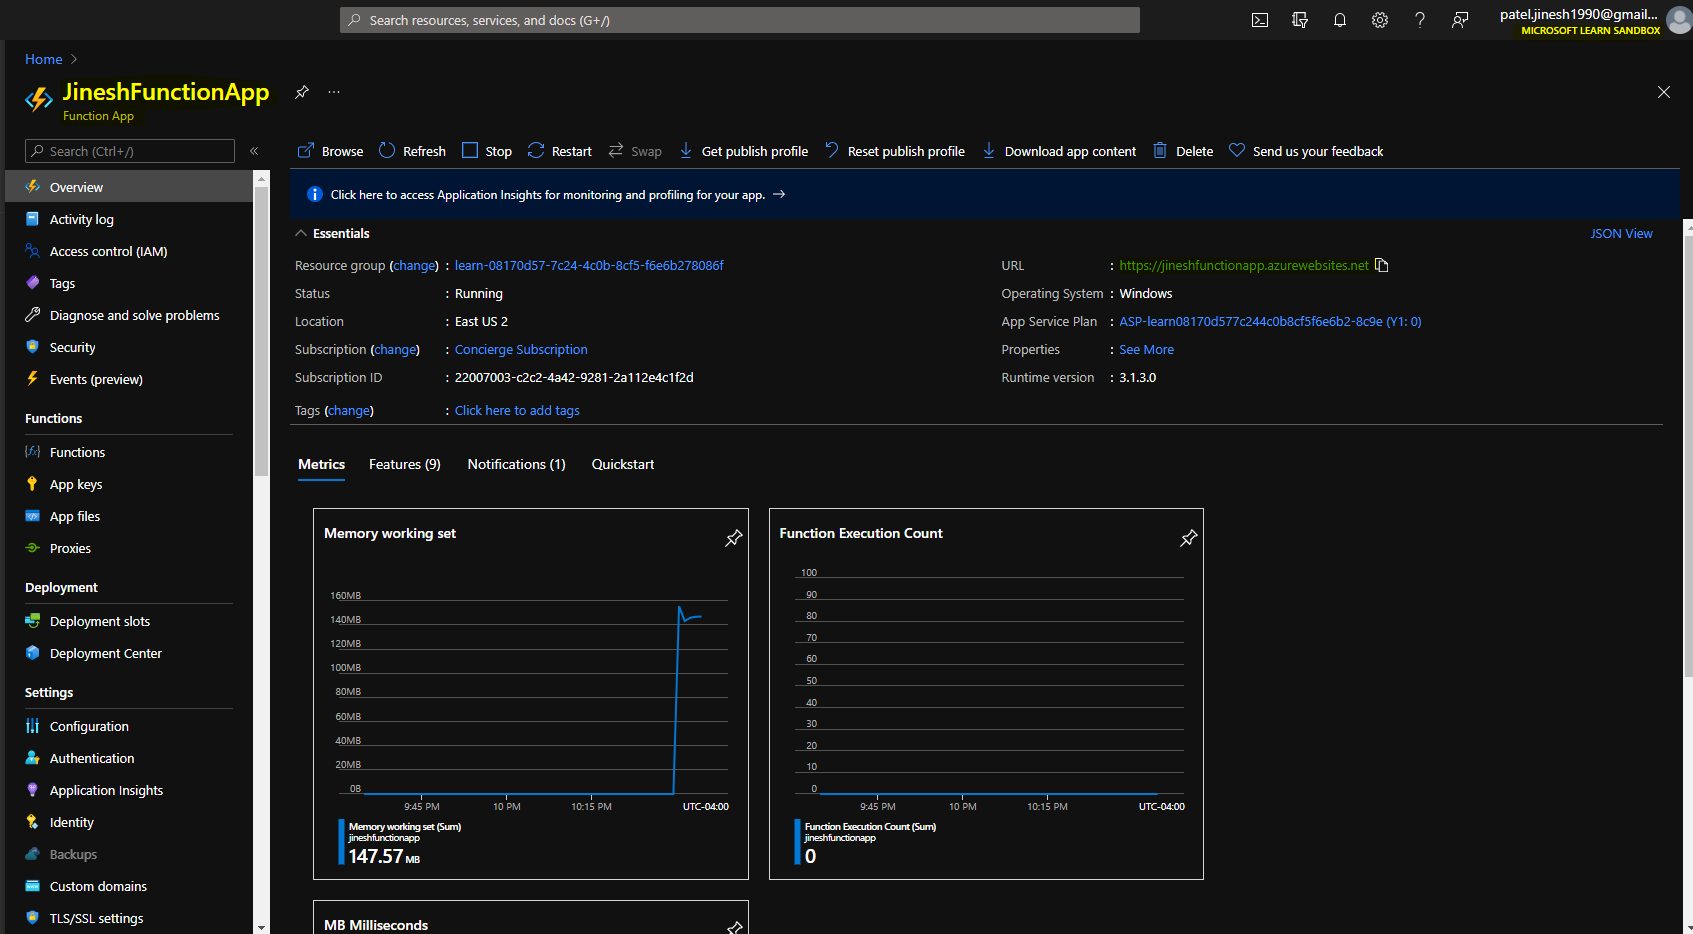
- Review + Create and Create
Result
Functions are event driven (Triggers), which means they run in response to an event.
You must configure a function with exactly one trigger.
Triggers can be any of the following services
Blob Storage                        Queue Storage
Event Grid                             HTTP
Microsoft Graph Events                Azure Cosmos DB
Service Bus                          Timer
Little bit about bindings
Bindings are a declarative way to connect data and services to your function. Bindings know how to talk to different services, which means you don't have to write code in your function to connect to data sources and manage connections.
Each function can have zero or more bindings to manage the input and output data processed by the function.
Defining a sample binding for an Example,
" Let's say we want to write a new row to Azure Table storage whenever a new message appears in Azure Queue Storage. This scenario can be implemented using an Azure Queue Storage trigger and an Azure Table storage output binding."
JSON
{
  "bindings": [
    {
      "name": "order",
      "type": "queueTrigger",
      "direction": "in",
      "queueName": "myqueue-items",
      "connection": "MY_STORAGE_ACCT_APP_SETTING"
    },
    {
      "name": "$return",
      "type": "table",
      "direction": "out",
      "tableName": "outTable",
      "connection": "MY_TABLE_STORAGE_ACCT_APP_SETTING"
    }
  ]
}
This example is a simple illustration of how we configure bindings for a function. We could change the output to be an email using a SendGrid binding, or put an event onto a Service Bus to notify some other component in our architecture, or even have multiple output bindings to push data to various services.
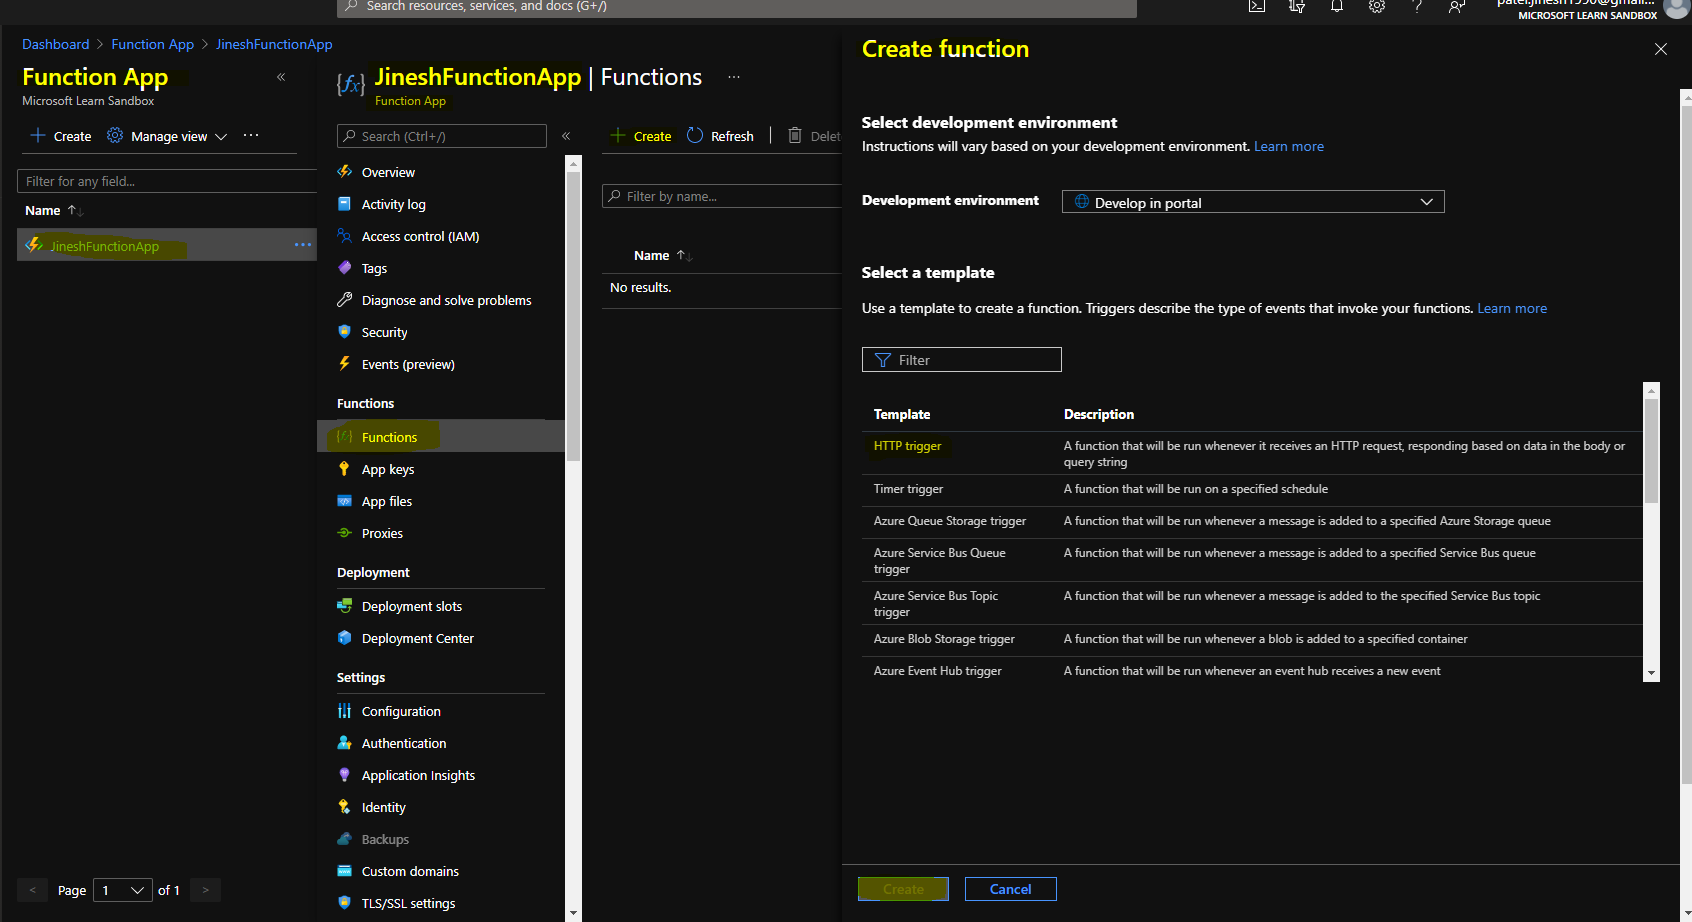
Create a function in the Azure portal in your Function App,
Azure provides several pre-made function templates for common scenarios: Selecting a template from the Add function pane provides easy access to the most common templates. as per,
Screenshot shows I selected HTTP Trigger 1 function
Navigate to your function and files : HTTPTrigger1 | Code + Test > Test/Run > function.json file
As per,
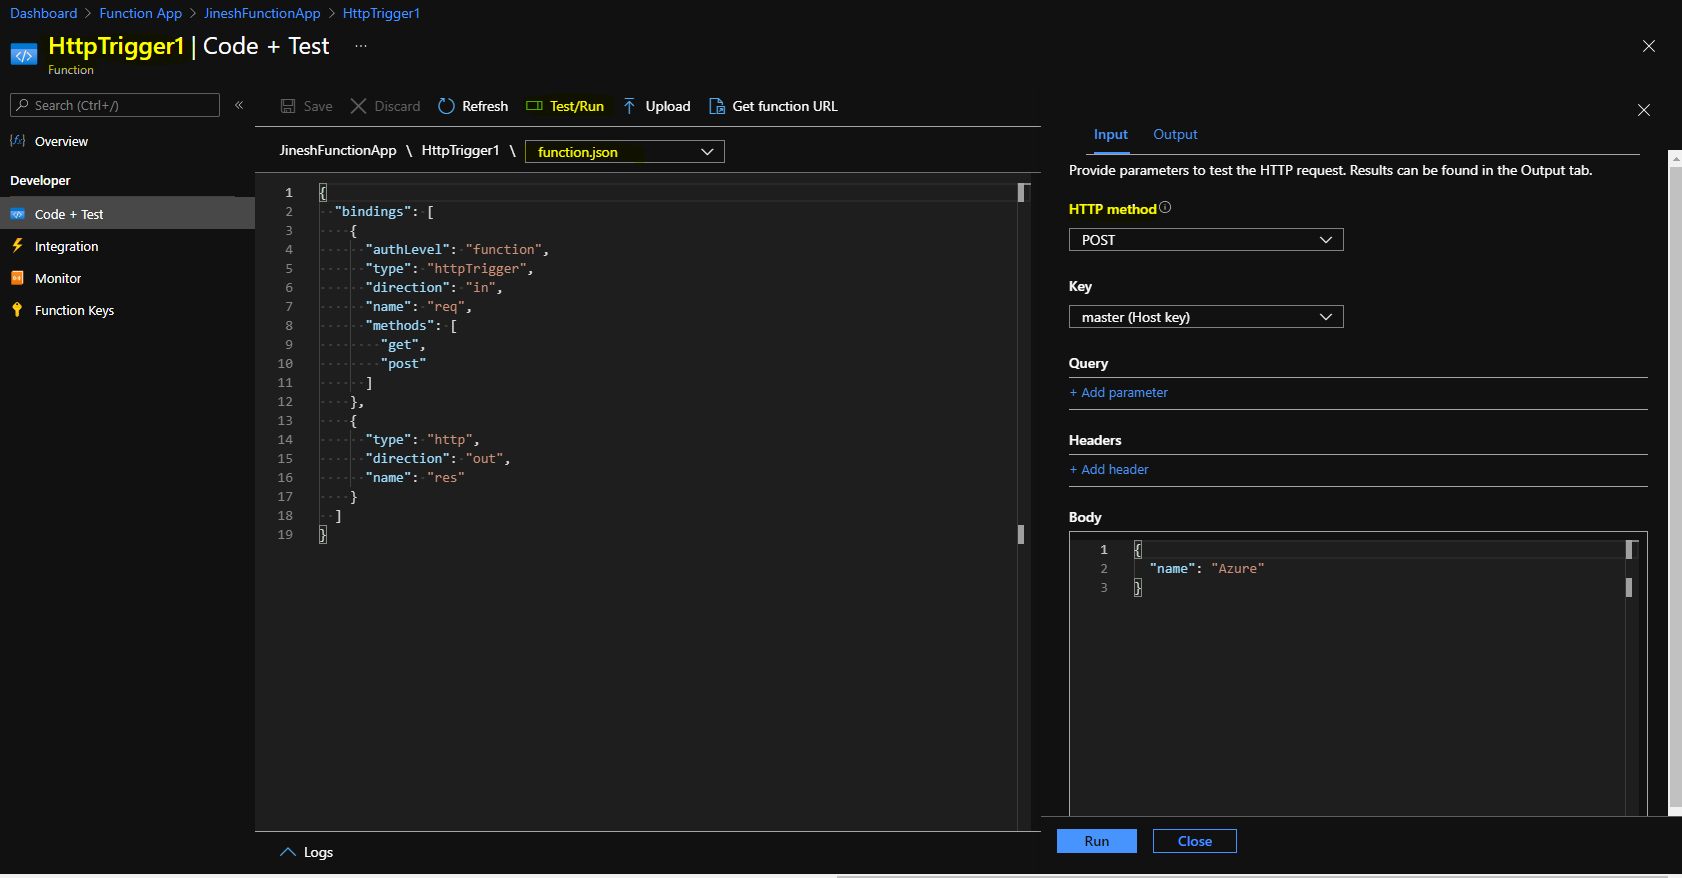
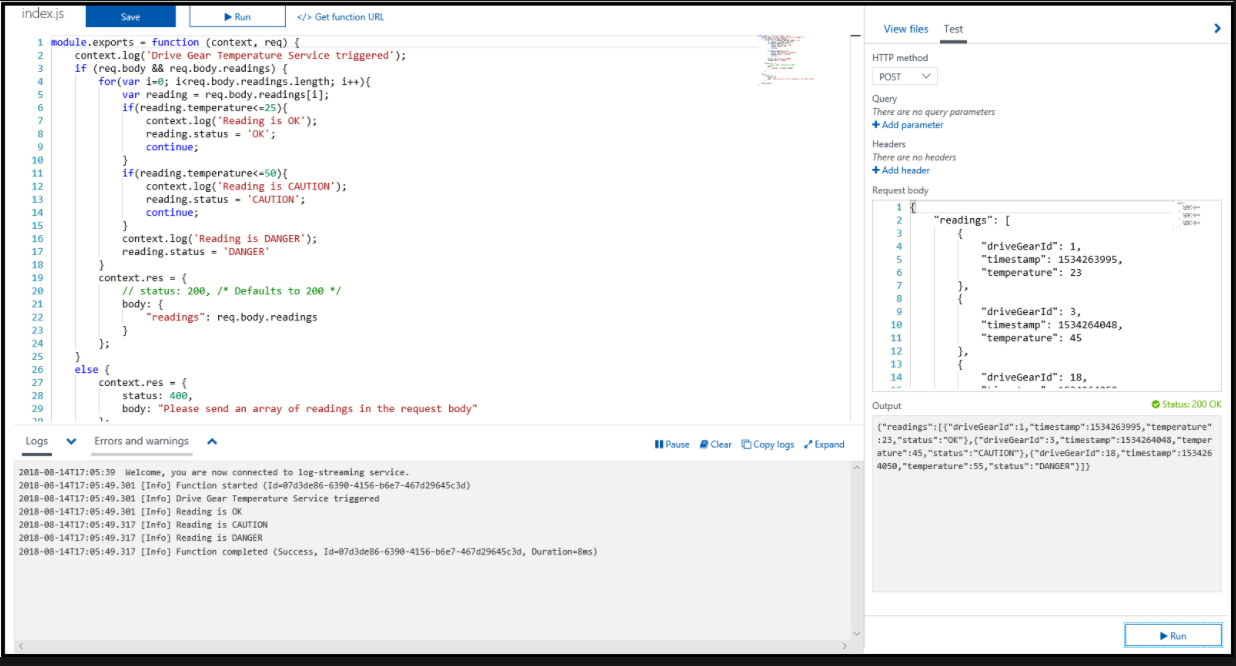
Test in the Azure portal
The portal also provides a convenient way to test your functions. As previously described, after selecting Test/Run from the top menu bar, on the right side of the code box, a tabbed Test pane appears. Here, you can provide parameters to test the HTTP request. When you select Run in this pane, the results appear in the Output tab, along with a status code in the Logs pane.
Add logic to the function app
Example : Add the logic for the temperature number. Specifically, we're going to receive data from an HTTP request.
First, we need to define some requirements for our logic:
Temperatures between 0-25 degrees should be flagged as OK.
Temperatures between 26-50 degrees should be flagged as CAUTION.
Temperatures above 50 degrees should be flagged as DANGER.
Replace Index.js file content with following for our js logic JS code, as per,
module.exports = function (context, req) {
context.log('Drive Gear Temperature Service triggered');
if (req.body && req.body.readings) {
req.body.readings.forEach(function(reading) {
if(reading.temperature<=25) {
reading.status = 'OK';
} else if (reading.temperature<=50) {
reading.status = 'CAUTION';
} else {
reading.status = 'DANGER'
}
context.log('Reading is ' + reading.status);
});
context.res = {
body: {
"readings": req.body.readings
}
};
}
else {
context.res = {
status: 400,
body: "Please send an array of readings in the request body"
};
}
context.done();
};
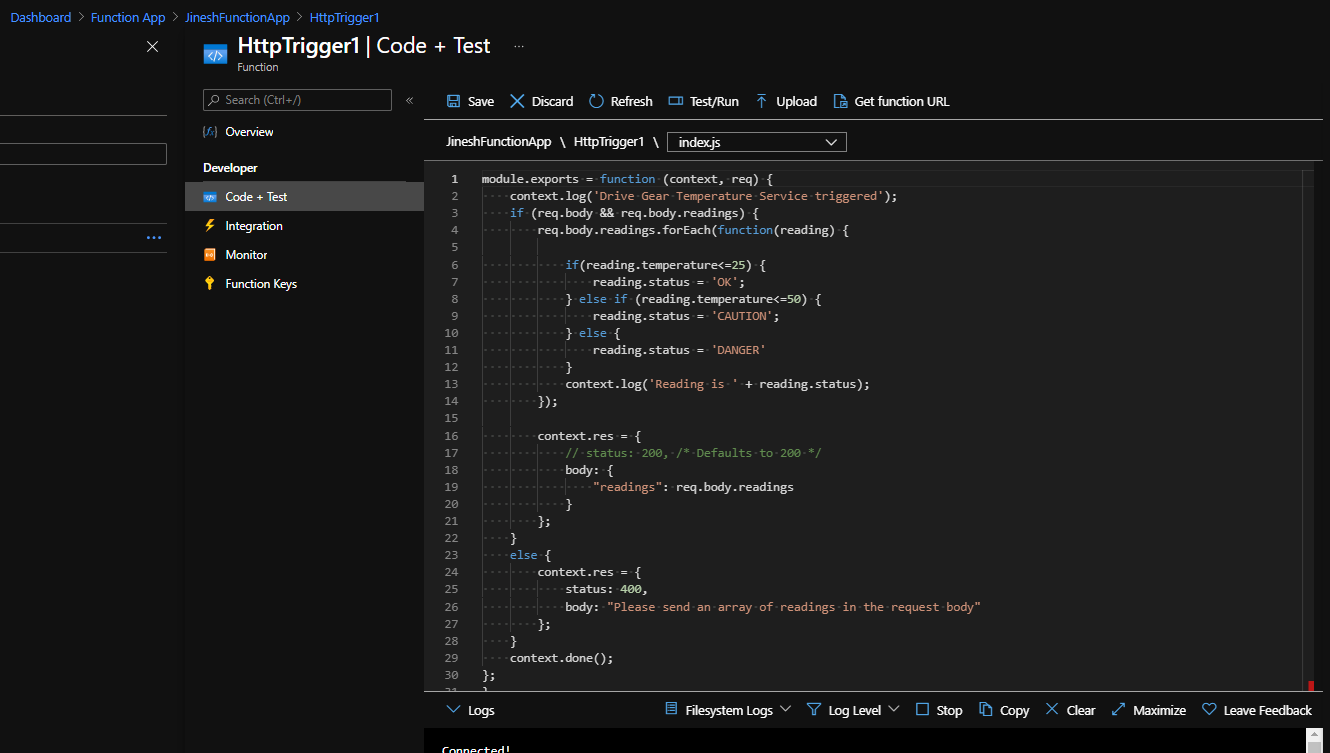
The logic we added is straightforward. We iterate over the array of readings and check the temperature field. Depending on the value of that field, we set a status of OK, CAUTION, or DANGER. We then send back the array of readings with a status field added to each entry.
Test our business logic
In this case, we're going to use the Test pane in the portal to test our function.
In the Test pane, under the Input tab, paste the sample request into the request Body text box.
{
    "readings": [
        {
            "driveGearId": 1,
            "timestamp": 1534263995,
            "temperature": 23
        },
        {
            "driveGearId": 3,
            "timestamp": 1534264048,
            "temperature": 45
        },
        {
            "driveGearId": 18,
            "timestamp": 1534264050,
            "temperature": 55
        }
    ]
}
like this,
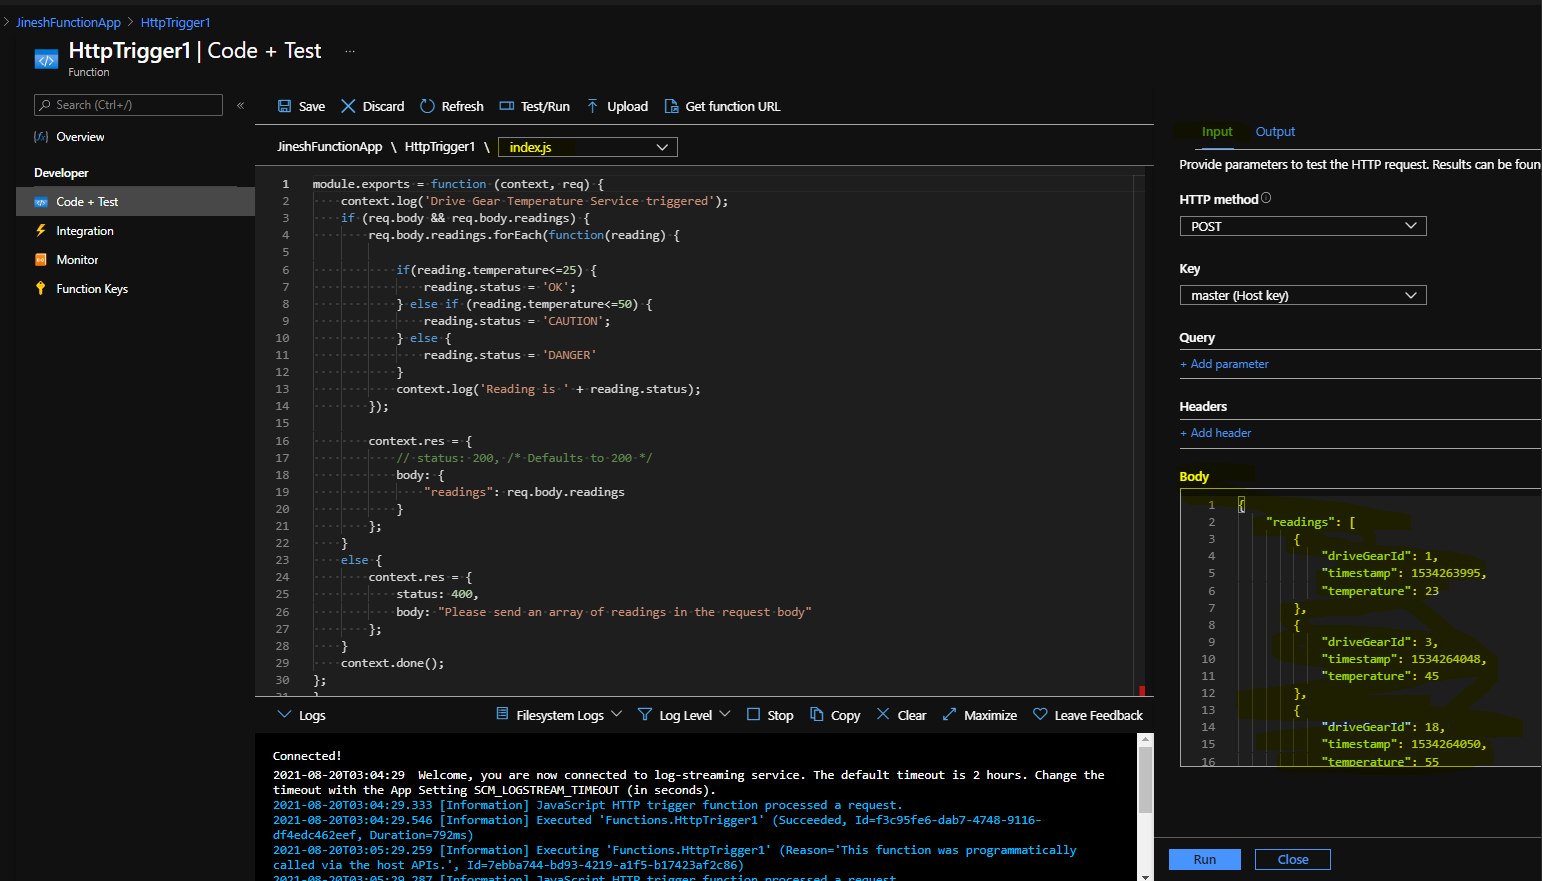
Select Run and view the response under the Output tab.
Resource to know more in detail,
Create serverless logic with Azure Functions
Feel free to try and Let me know if you have any questions or improvements I can provide.
I hope you like the Blog: Introduction to ARM Templates.
Thanks for the read. Follow for more Awesome Azure and AWS Content.
Regards,
Jineshkumar Patel