

How-To SYNC your On-Premise AD with AZURE AD (Hands-On)
#AzureAD #AzureADConnect #AzureADcloudsync


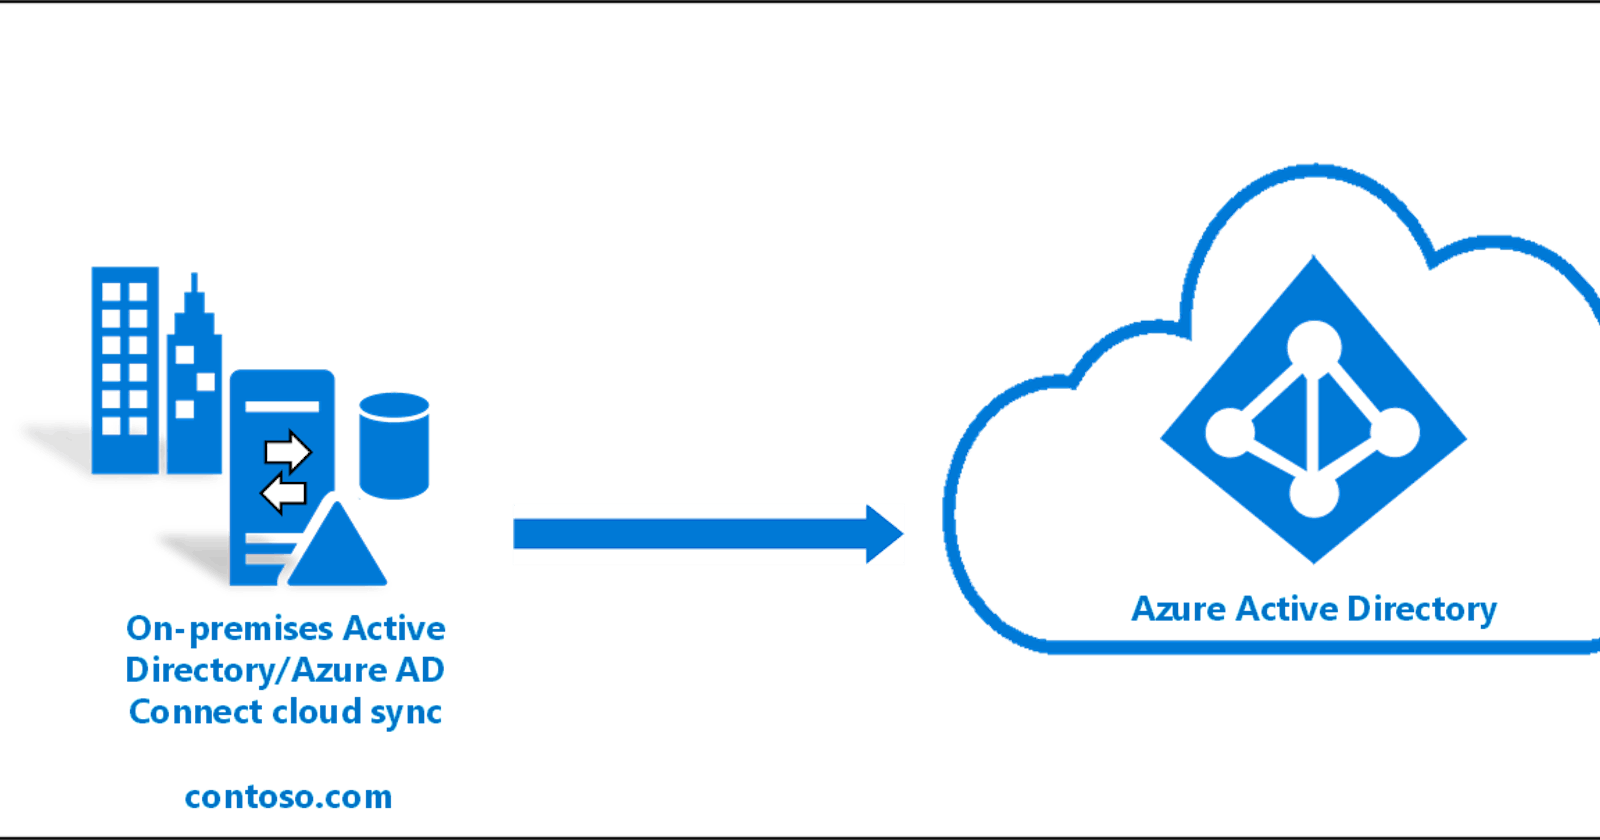
In this Tutorial Blog, We will integrate a Single Forest On-Premise Active Directory (AD) with our Azure Active Directory(AAD) using
Azure AD Connect > "Azure AD cloud sync"
What is Azure AD Connect cloud sync?
Azure AD Connect Cloud Sync is a cloud service alternative to Azure AD Connect software. The organization deploys one or more lightweight agents in their on-premises environment to bridge AD and Azure AD. The configuration is done in the cloud.
Prerequisites
- Global administrator account on your Azure AD.
- Tenant in Azure Active Directory.
- On-Premise AD Server Administrator Access.
My Set up
- Server 2016 running from VirtualBox. Conside it On-Prem Server.
- AD DS Role Installed (AD Server.)(Local Forest Domain is JP.local)
- Azure Portal Global Administrator access.
Step by step guide to Follow
Create Azure AD and Create a Tanent
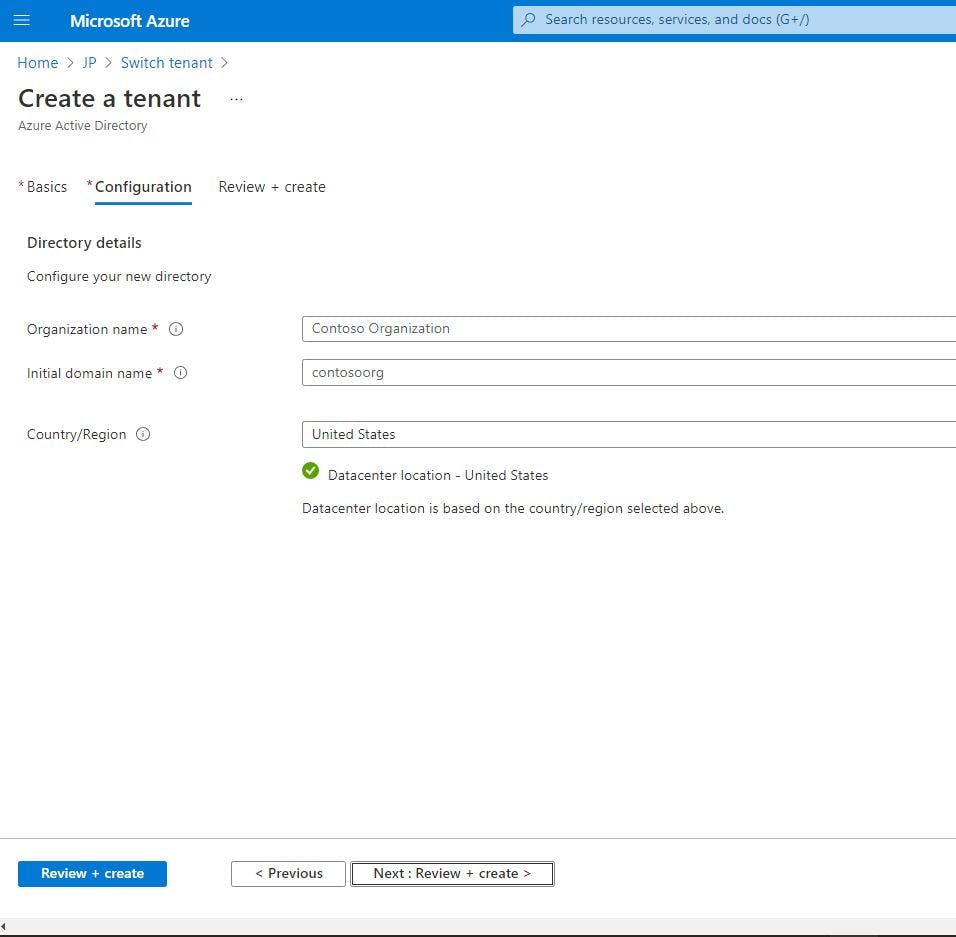
Tanent Type : Azure Active Directory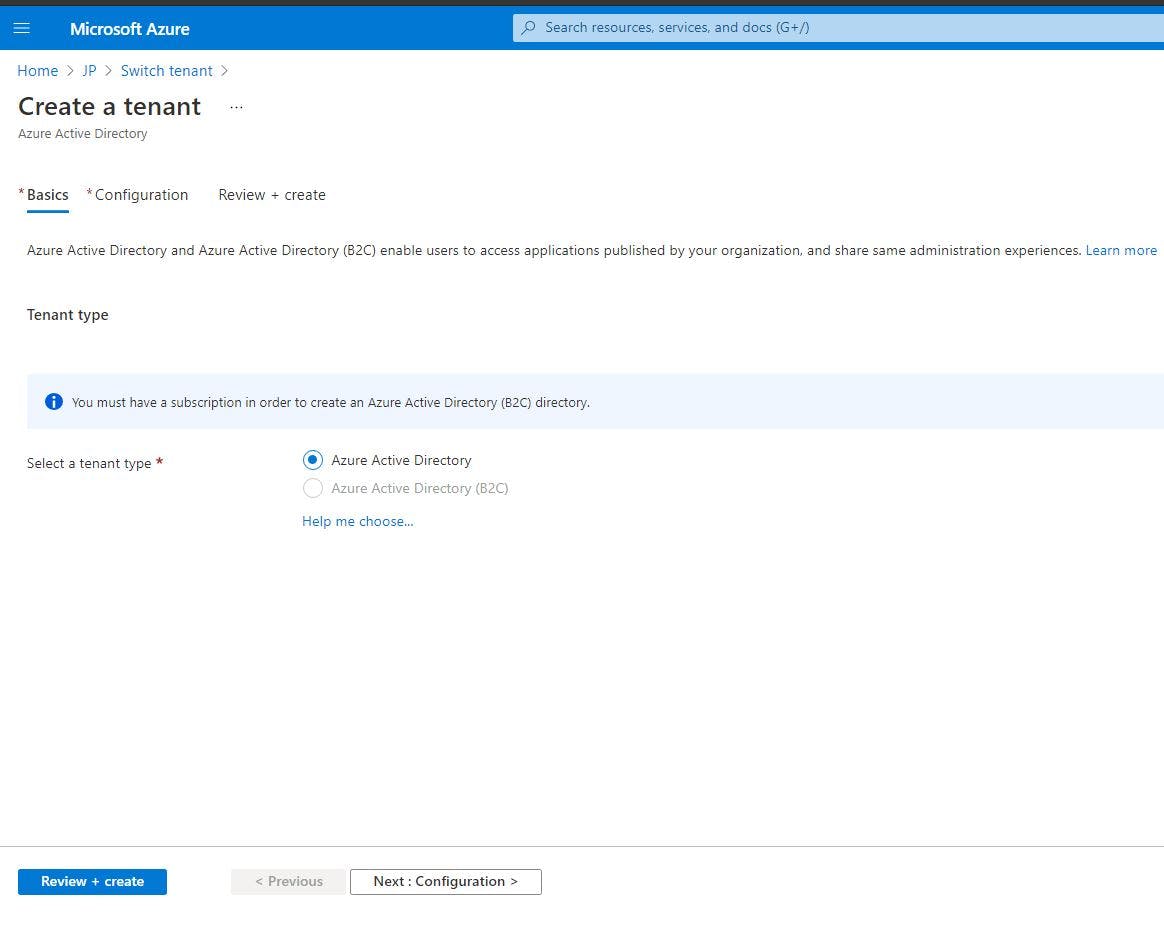 Configure the Organization Name and Domain Name. Review+Create
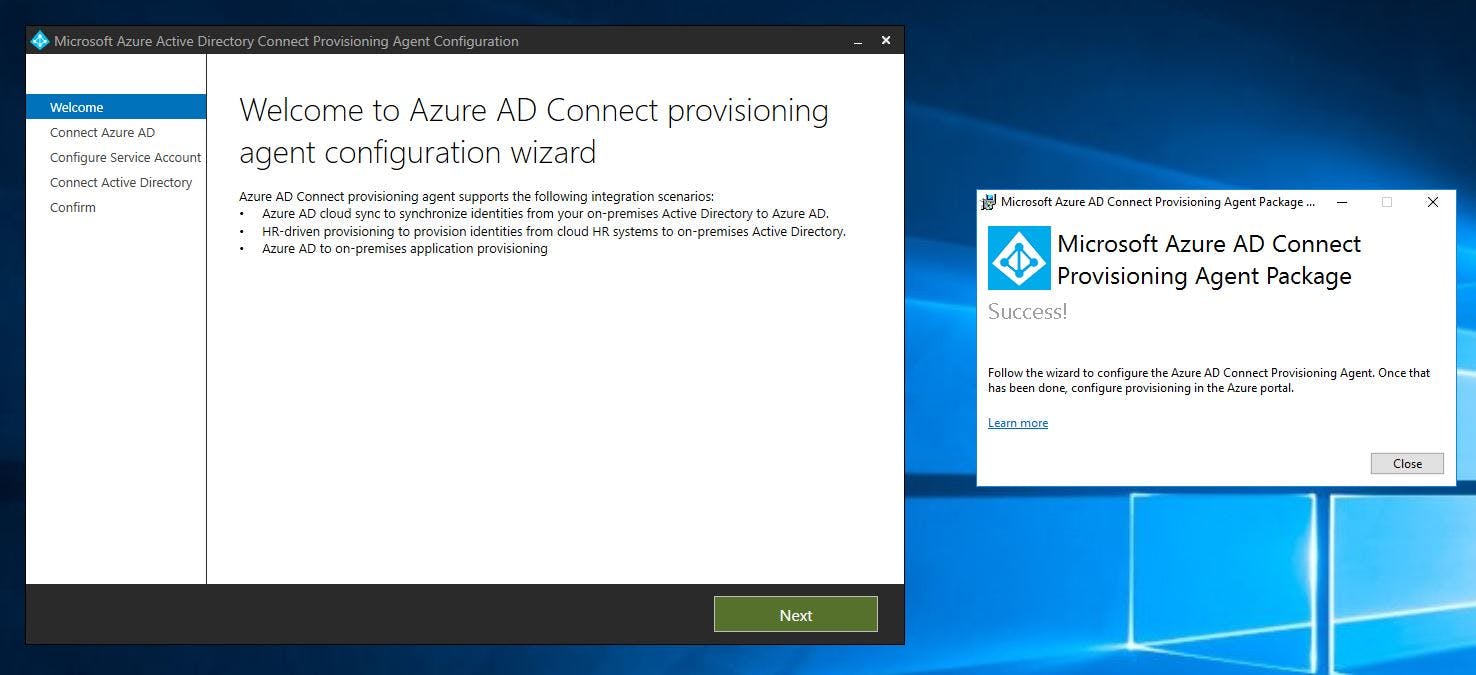
Download Azure AD cloud sync Agent and Move it to your Local On Premise Active Directory Server
Installing AADConnectProvisioningAgentSetup.exe on On Prem AD Server.
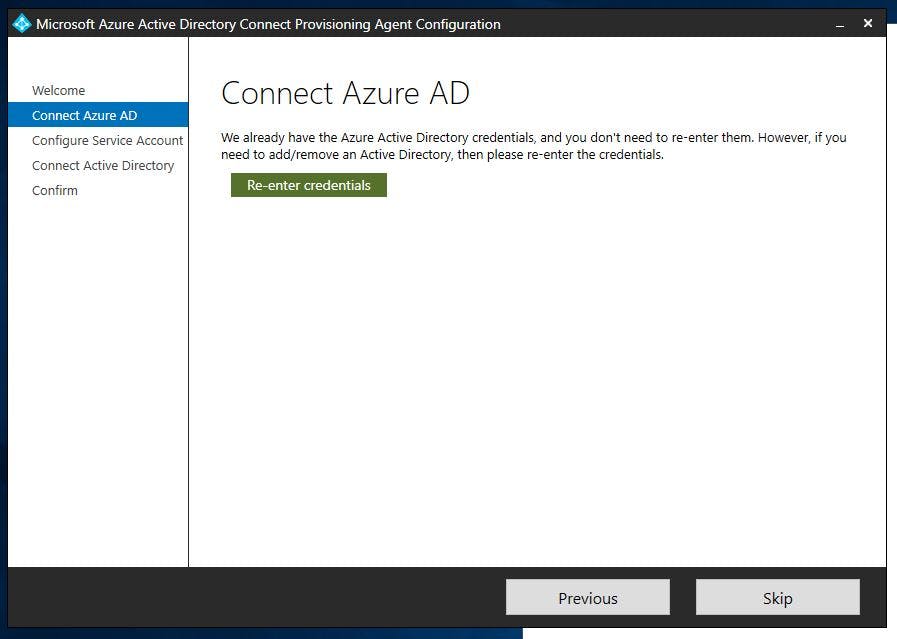
 Connect/Authenticate Login to Azure AD using Global Admin Account created for Azure AD Directory.
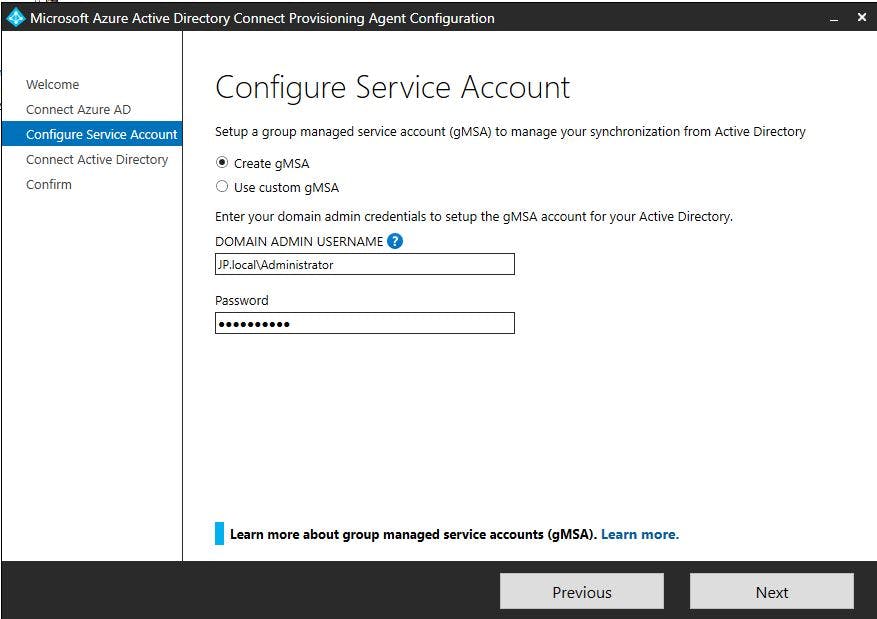
 Configure Service Account
 Connect On Prem Active Directory Domain (Mine is JP.local)
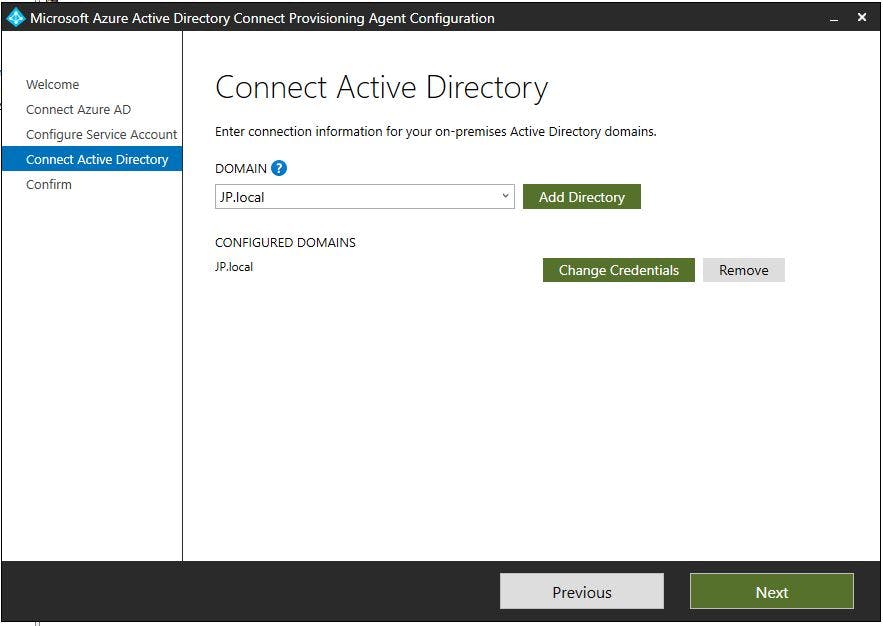 Agent Install Configuration Confirm Page.
Active Directory Configuration to Local Domain (JP.LOCAL)
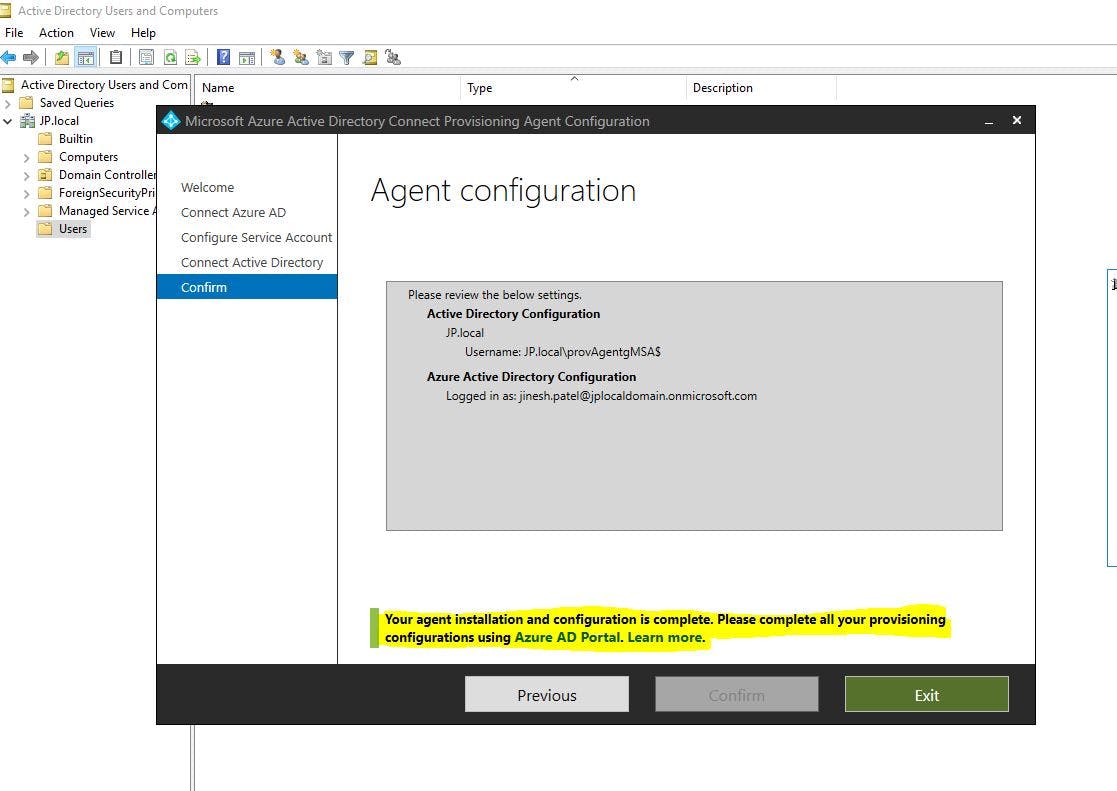
Azure Active Directory Global Administrator Login configuration.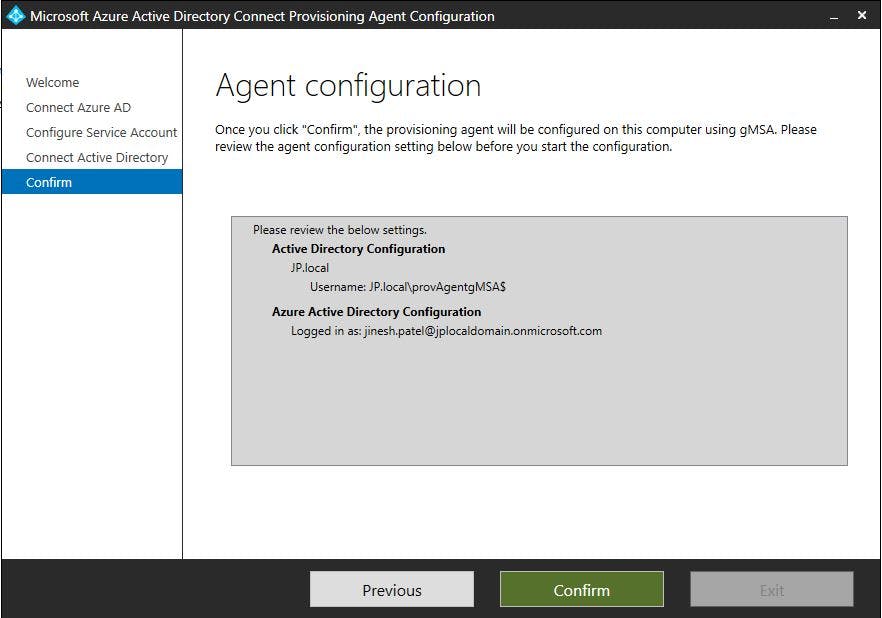 Your agent Installation and Configuration is complete. Provision on Azure AD Portal.
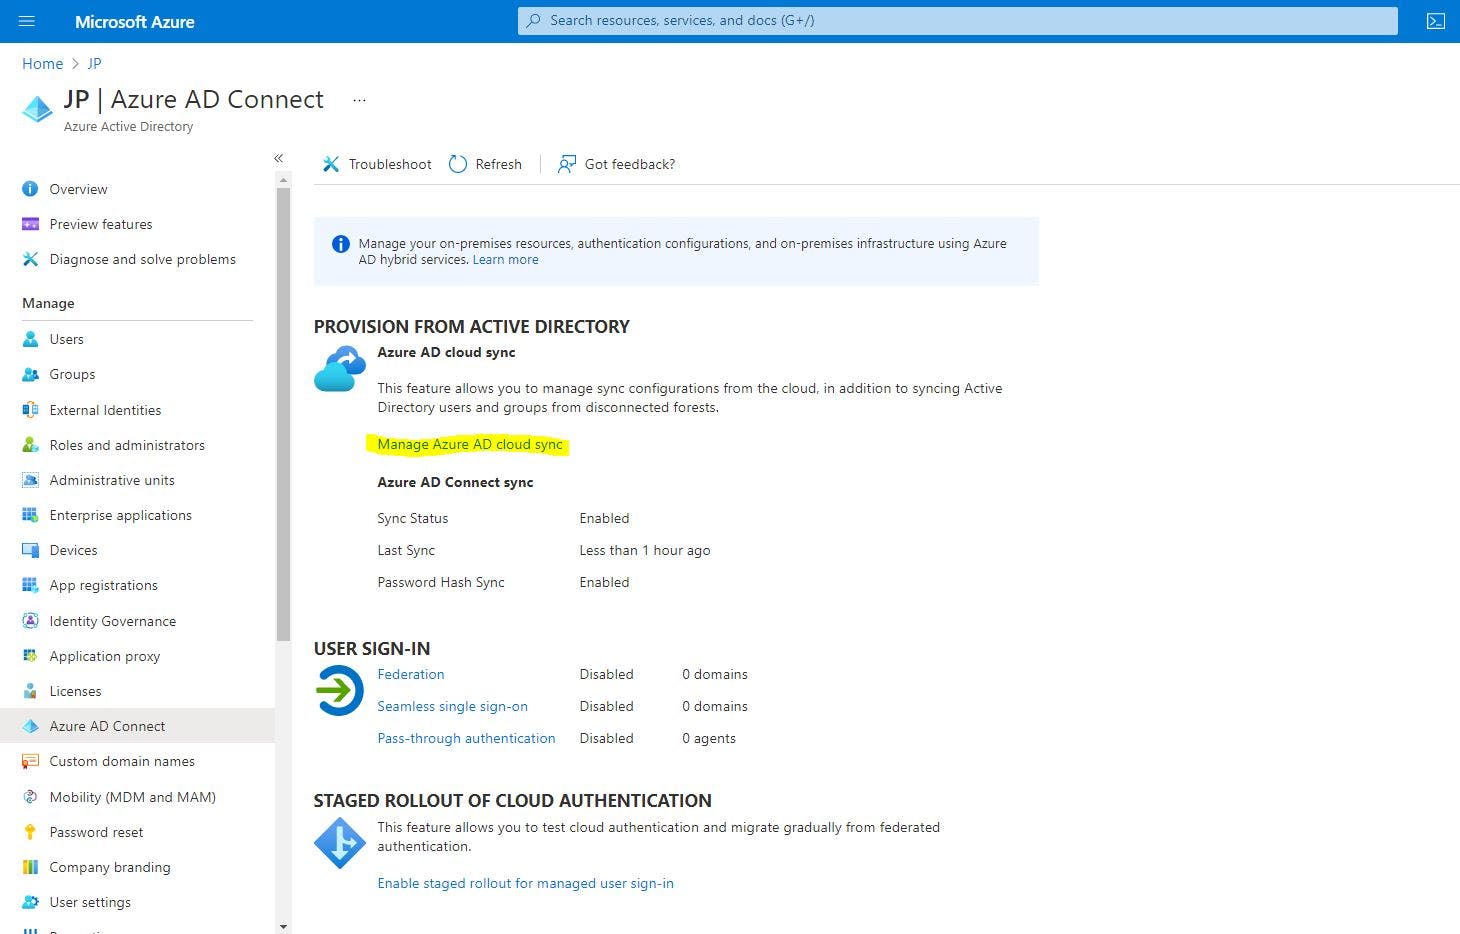
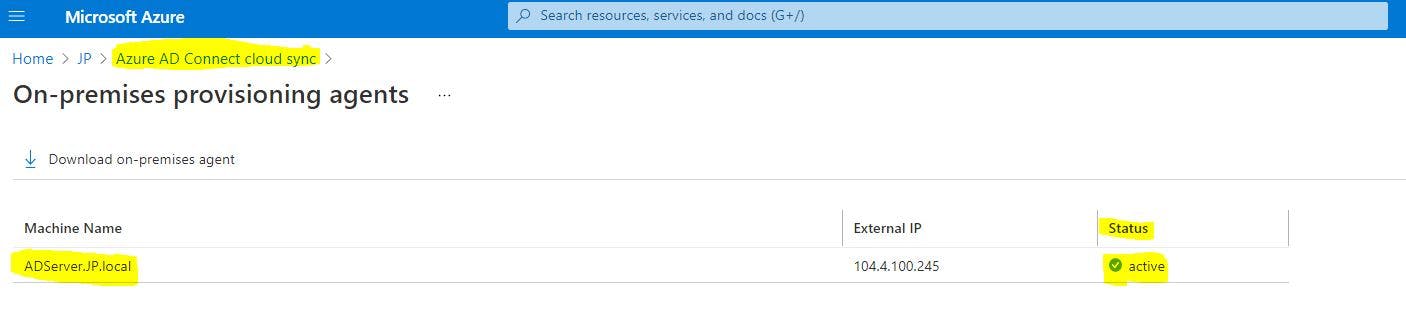
Azure portal agent verification by > Azure AD> Azure AD Connect Cloud Sync > Review All Agents >It shows Active for my AD Machine.
 Also, verify on On-Premise AD Server Services where "Azure AD Connect Agent" Services are running,
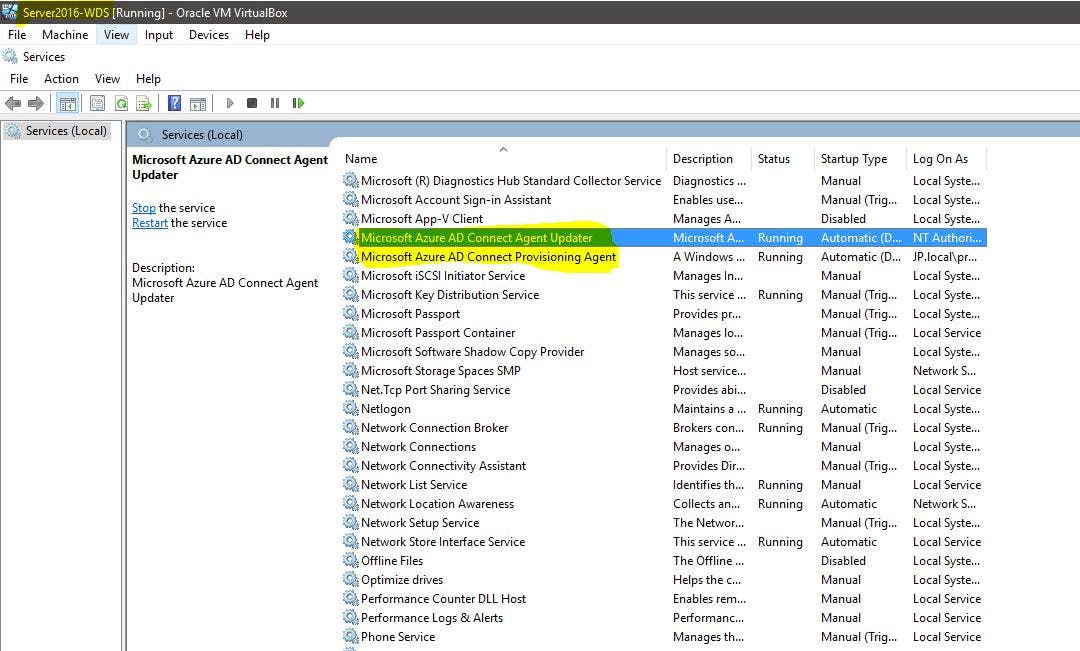 So far so good. Verified. Status: Active.
 Configure Azure AD Connect cloud sync
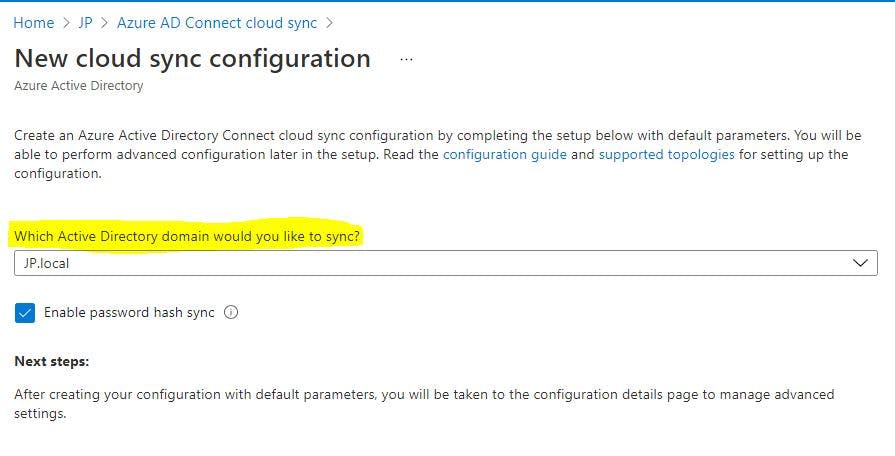
Portal > Azure AD > Azure AD Connect > Manage Azure AD cloud sync > New Configuration.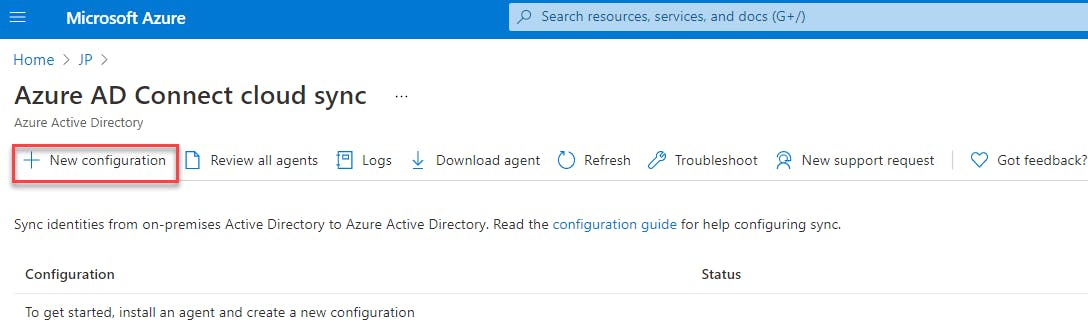 It will automatically filled recently installed AD Connect Cloud Sync Agent Domain (Mine is JP.local)
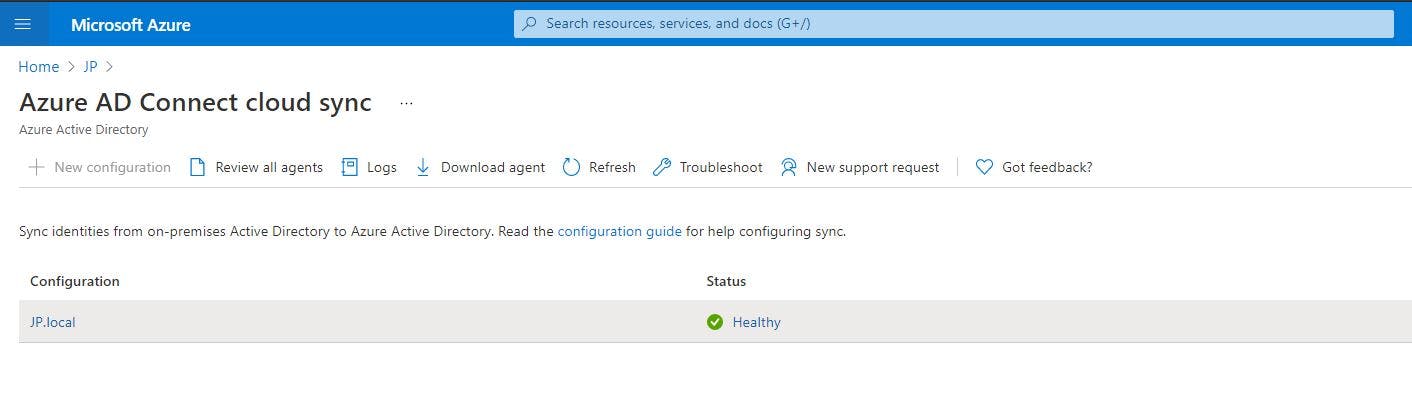
Next will allow to edit this provisioning configuration which asks Configuration Scope for Domain or if you want to use any Filter for scope for sync. Also Validate , Notification settings and deploy.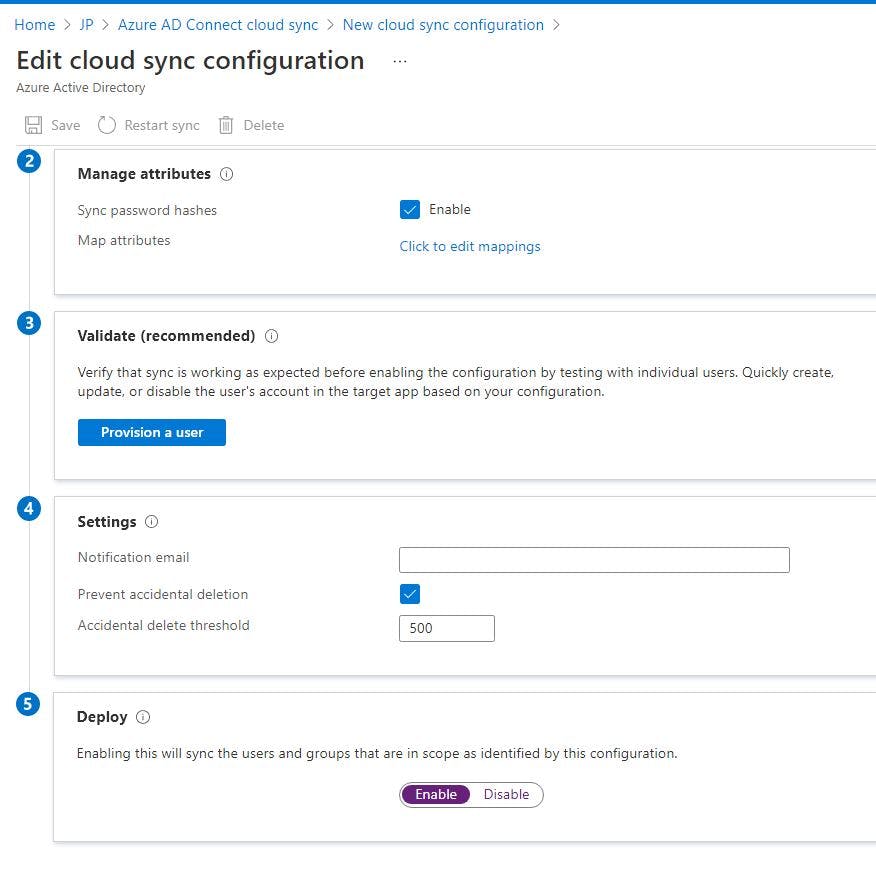 Great ! Saved and My AD Provisioning for JP.local domain is showing "HEALTHY" STATUS
- Verify users are created and synchronization is occurring
For this Test, I created 4 Users (First, Second, Third, Fourth)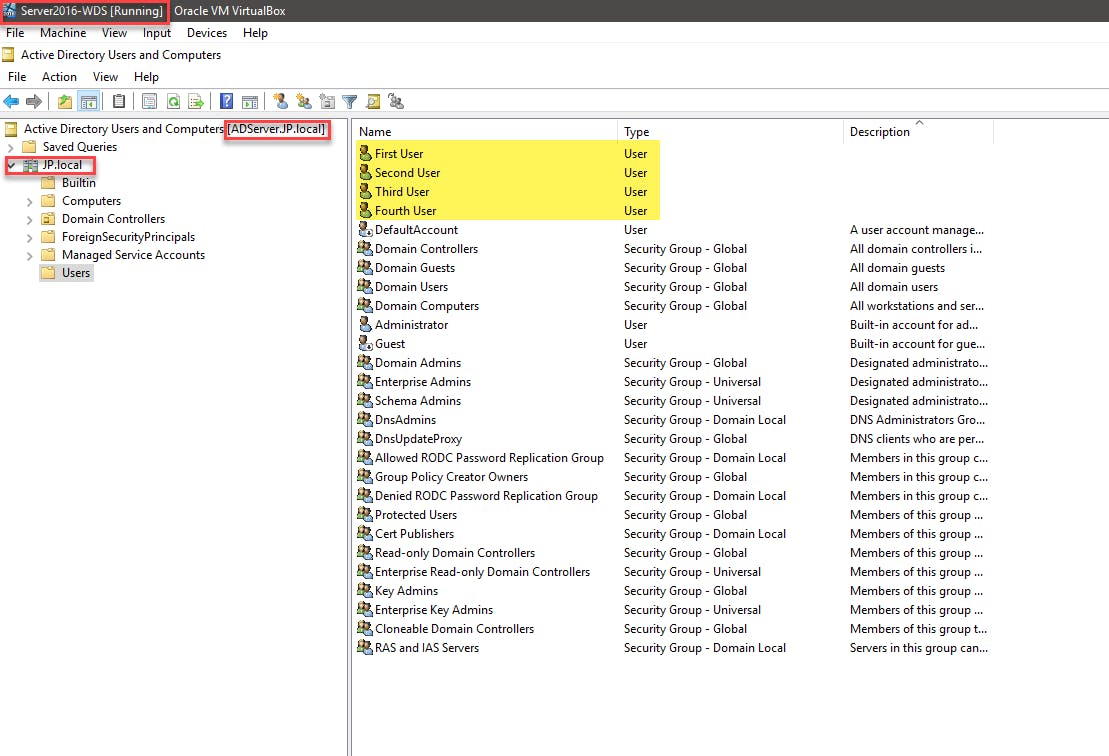
And Wooooalllaaaa!! It all synced in few Seconds to my Azure AD under all Users. Note : Directory Synced: YES for local AD Synced Users.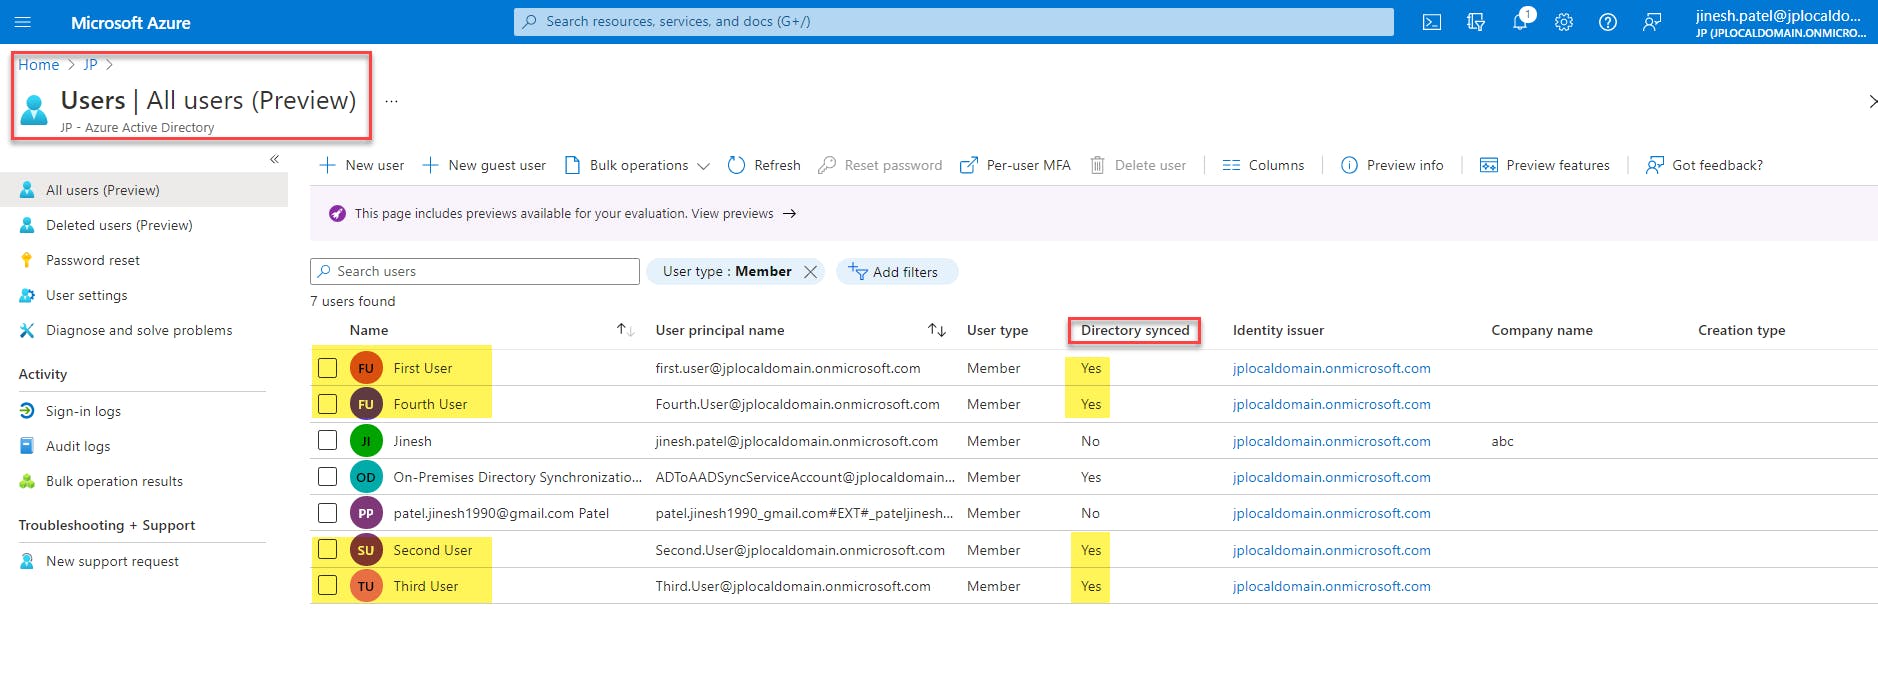
Managing Users from Microsoft 365 Admin Center
I could have also assigned an Administrator Role and have New User signed in into MS 365 Admin Center to manage AD Administration.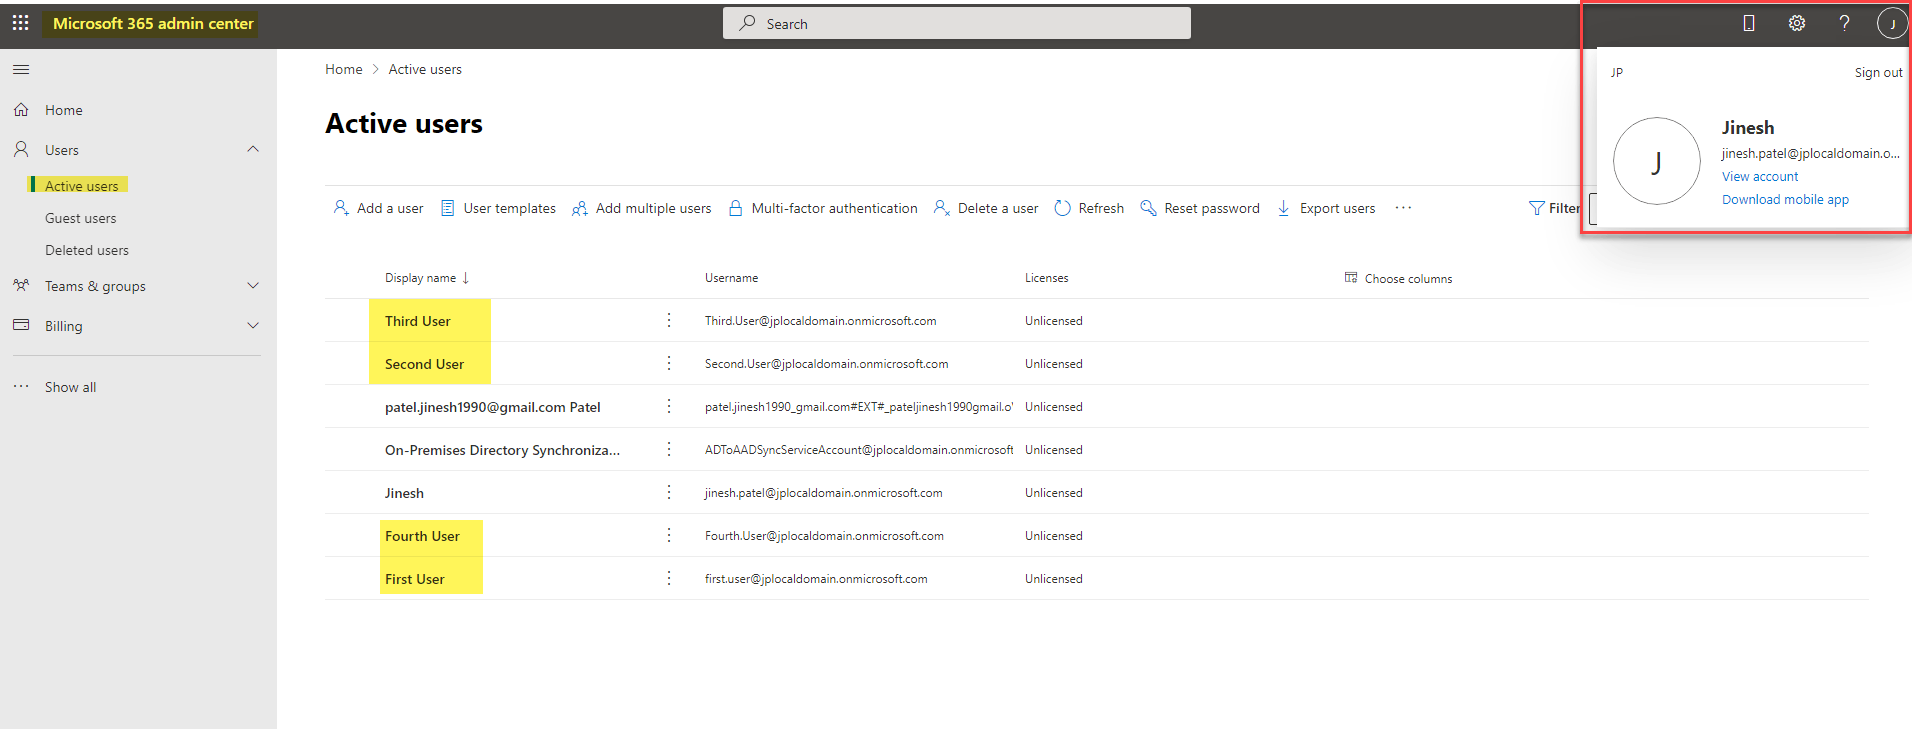
We have now successfully configured a hybrid identity environment between On-Prem AD and Azure AD using Azure AD Connect cloud sync.
Hope you followed up with this hands-on tutorial. Thank you for the read. I appreciate your time. Let me know if you have any questions or queries during following along with the steps.
Follow for more Azure and AWS Content.
Regards,
Jineshkumar Patel